
목차
목표
아두이노를 사용하여 원격(블루투스)로 220V 램프를 ON/OFF 를 해볼 것입니다.
준비
WAT-Arduino128 예제
부품 목록
| 번호 | 부품명 | 수량 | 기능 | 판매처 |
|---|---|---|---|---|
| 1 | WAT-Arduino128 | 1 | 아두이노 | https://kit128.com/goods/view?no=64 |
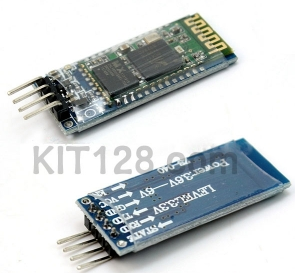
| 2 | HC-06 | 1 | 블루투스 통신 | https://kit128.com/goods/view?no=65 |
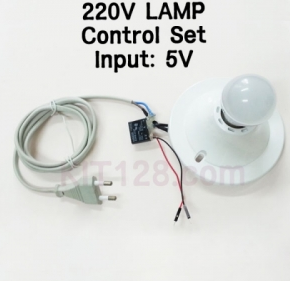
| 3 | 220V LAMP Control Set | 1 | 220V 제어 모듈 | https://kit128.com/goods/view?no=130 |
| WAT-Arduino128 | HC-06 | 220V LAMP Control Set |
|---|---|---|
|
|
|
|

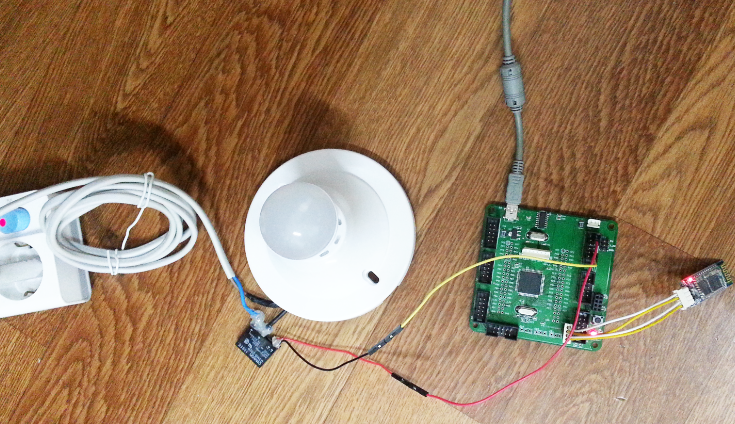
다음과 같이 220V Lamp Control Set 의 ‘+’ 를 아두이노 5V, ‘-‘ 를 아두이노 PA0에 연결합니다.
소스코드
최신 소스코드는 [파일]=>[예제]=> [WhiteAT]=>[Bluetooth_SSR] 에 있습니다.
/*
 컴퓨터(또는 안드로이드)의 블루투트 통신으로
 WAT-Arduino128 에 연결된 SSR 로 220V 램프를 ON/OFF 하는 예제

 출처: http://whiteat.com/Arduino

 부품
 . WAT-Arduino128 : https://kit128.com/goods/view?no=64
 . Bluetooth Module HC-06 (5V) : https://kit128.com/goods/view?no=65
 . 220V LAMP Control Set: https://kit128.com/goods/view?no=130


*/

int SSR_PIN = PA0;
#define SSR_ON digitalWrite(SSR_PIN, LOW)
#define SSR_OFF digitalWrite(SSR_PIN, HIGH)


// 프로그램 시작 - 초기화 작업
void setup()
{
 // SSR 제어핀을 출력으로 설정, SSR OFF
 SSR_OFF;
 pinMode(SSR_PIN, OUTPUT);

 Serial.begin(115200); // 아두이노 시리얼 모니터 화면
 Serial.print("Connecting Serial to PC");
 Serial1.begin(9600); // (블루투스)HC-06 용 시리얼
 Serial1.print("AT+NAME BT - Whiteat.com\n");
}

void loop()
{
 // 시리얼 인터럽트를 사용해서 loop 는 공백으로 둔다.
}

String inString;

void serialEvent()
{
 ParseSerial(&Serial);
}

void serialEvent1()
{
 ParseSerial(&Serial1);
}

void ParseSerial(Stream *serial)
{
 while (serial->available())
 {
 int inChar = serial->read();
 if (isAlphaNumeric(inChar))
 {
 inString += (char)inChar;
 }
 else if (inChar == '\n')
 {
 if (inString.length() >= 2)
 {
 if (inString.charAt(0) == 'O' && inString.charAt(1) == 'N')
 {
 // ON
 SSR_ON;
 serial->println("ON");
 }
 else if (inString.charAt(0) == 'O' && inString.charAt(1) == 'F')
 {
 // OFF
 SSR_OFF;
 serial->println("OFF");
 }
 }
 inString = "";
 }
 }
}
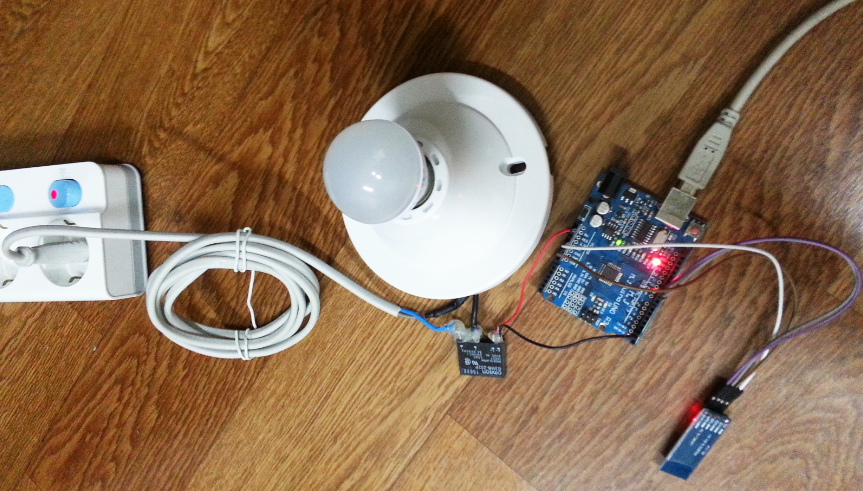
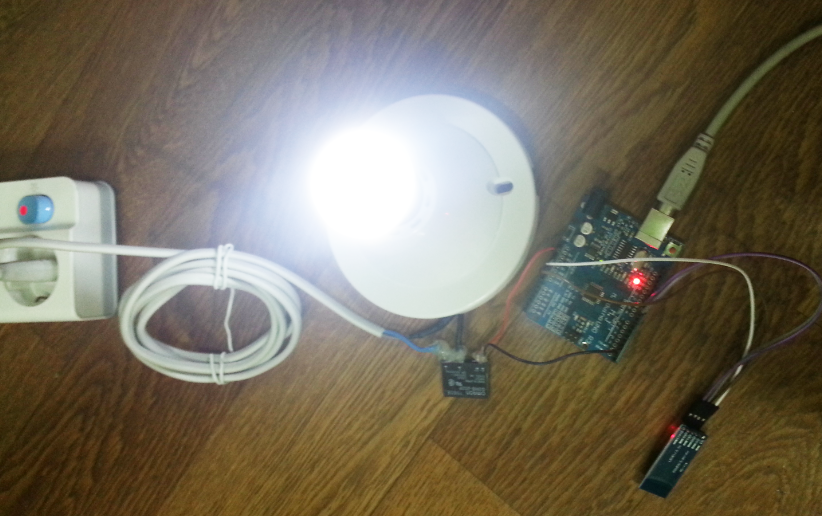
결과
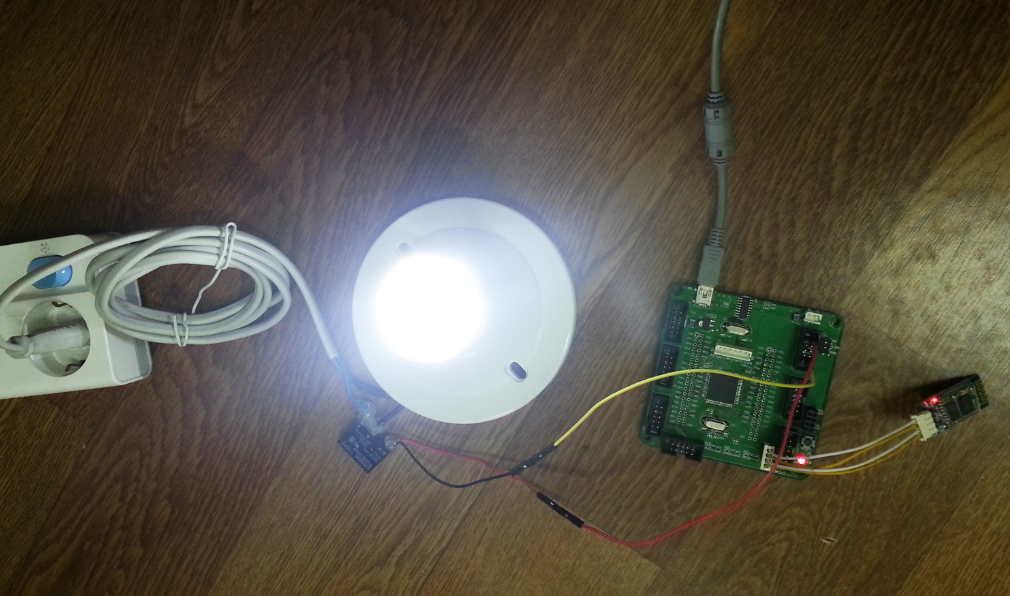
스마트폰 (또는 컴퓨터)에서 블루투스를 연결한 후 “ON”, “OFF” 데이터를 보낼 수 있습니다.
“ON” 을 보내면 LAMP는 ON,
“OFF”를 보내면 LAMP 는 OFF 됩니다.
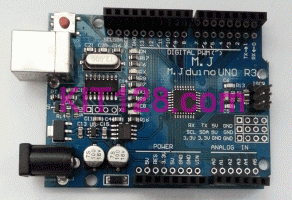
Arduino UNO R3 예제
부품 목록
| 번호 | 부품명 | 수량 | 기능 | 판매처 |
|---|---|---|---|---|
| 1 | Arduino UNO R3 | 1 | 아두이노 | https://kit128.com/goods/view?no=337 |
| 2 | HC-06 | 1 | 블루투스 통신 | https://kit128.com/goods/view?no=65 |
| 3 | 220V LAMP Control Set | 1 | 220V 제어 모듈 | https://kit128.com/goods/view?no=130 |
| Arduino UNO R3 | HC-06 | 220V LAMP Control Set |
|---|---|---|
|
|
|
|
다음과 같이 220V Lamp Control Set 의 ‘+’ 를 아두이노 5V, ‘-‘ 를 아두이노 핀 2 에 연결합니다.
소스코드
최신 소스코드는 [파일]=>[예제]=> [WhiteAT UNO]=>[Bluetooth_SSR] 에 있습니다.
/*
 컴퓨터(또는 안드로이드)의 블루투트 통신으로
 UNO 에 연결된 SSR 로 220V 램프를 ON/OFF 하는 예제

 출처: http://whiteat.com/Arduino

 부품
 . Arduino UNO R3 : https://kit128.com/goods/view?no=337
 . Bluetooth Module HC-06 (5V) : https://kit128.com/goods/view?no=65
 . 220V LAMP Control Set: https://kit128.com/goods/view?no=130

*/

int SSR_PIN = 2;
#define SSR_ON digitalWrite(SSR_PIN, LOW)
#define SSR_OFF digitalWrite(SSR_PIN, HIGH)

#include <SoftwareSerial.h>
SoftwareSerial mySerial(10, 11); // RX, TX

// 프로그램 시작 - 초기화 작업
void setup()
{
 // SSR 제어핀을 출력으로 설정, SSR OFF
 SSR_OFF;
 pinMode(SSR_PIN, OUTPUT);

 Serial.begin(115200); // 아두이노 시리얼 모니터 화면
 Serial.print("Connecting Serial to PC");
 mySerial.begin(9600); // (블루투스)HC-06 용 시리얼
 mySerial.print("AT+NAME BT - Whiteat.com\n");
}

void loop()
{
 ParseSerial(&mySerial);
}

String inString;

void ParseSerial(Stream *serial)
{
 while (serial->available())
 {
 int inChar = serial->read();
 if (isAlphaNumeric(inChar))
 {
 inString += (char)inChar;
 }
 else if (inChar == '\n')
 {
 if (inString.length() >= 2)
 {
 if (inString.charAt(0) == 'O' && inString.charAt(1) == 'N')
 {
 // ON
 SSR_ON;
 serial->println("ON");
 }
 else if (inString.charAt(0) == 'O' && inString.charAt(1) == 'F')
 {
 // OFF
 SSR_OFF;
 serial->println("OFF");
 }
 }
 inString = "";
 }
 }
}
결과
스마트폰 (또는 컴퓨터)에서 블루투스를 연결한 후 “ON”, “OFF” 데이터를 보낼 수 있습니다.
“ON” 을 보내면 LAMP는 ON,
“OFF”를 보내면 LAMP 는 OFF 됩니다.
220V 램프 제어 자료

이 사이트의 라이브러리는 VS로 작성이 되어있는데
리눅스는 지원을 안하는 것인가요?
현재는 윈도우에서만 설치 가능합니다.
감사합니다.
G3MB-202P DC5V 이것과 전선은 납땜 하신건가요
네 납땜 후에 안전을 위해서 글루건 작업을 하였습니다.
블루투스 연결법은따로 없나요?
블루투스는 VCC는 5V에, GND는 GND에
그리고 RX, TX를 원하는 핀에 연결하면 됩니다.
SoftwareSerial 를 사용하여서
핀 번호는 프로그램으로 조정할 수 있습니다.
메신저 궁금한거물어보고싶습니다. 연락방법있나요
기술적인 문의는 댓글이나 이메일로만 받고 있습니다.
위에 답변드렸습니다.
Arduino UNO R3를 사용하여서 현재 HC-06과 UNO R3 를 가지고 블루토스 통신이되는지 기본적으로 확인해보려고합니다.방법좀 알려주실수있으실까요
이 예제가 우노와 HC-06의 기본 통신에 SSR만 포함된 예제입니다.
SSR 관련 코드만 삭제하시면 우노와 HC-06 의 기본통신이 됩니다.
어플 만드는 방법에 대해 나온게 있을까요
현재 어플 자료는 제공해드리지 않고 있습니다.
혹시 개발이 필요하시다면
help@whiteat.com 으로 내용을 주시면 됩니다.
ON은 신호를 인가하여 220V 가 연결되고
OFF는 신호가 끊겨 220V 끊기게 됩니다.
프로그램 사용시 아무 프로그램 사용하나요
블루투스 통신이 되는 어플은 모두 가능합니다.
따로 입력 법이 있는지 궁금합니다
블루투스 통신은
다른 통신과 마찬가지로
connect 후에 데이터 주고 받으면 됩니다.